How to Add or Change Logo
To make your brand or product more recognizable, you need a logo as an integral part of the design of your website.
As a rule, the logo is placed in the header and footer block, which is convenient from the standpoint of user experience.
In Weblium editor, you can either upload your custom logo in the .png format or create a text logo.
If you want to design a more intricate logo, you can try a free design tool (Logocreator) that provides high-resolution .png files.
Contents
How to upload logo
- First, add a Header or Footer block, which contains a logo element.
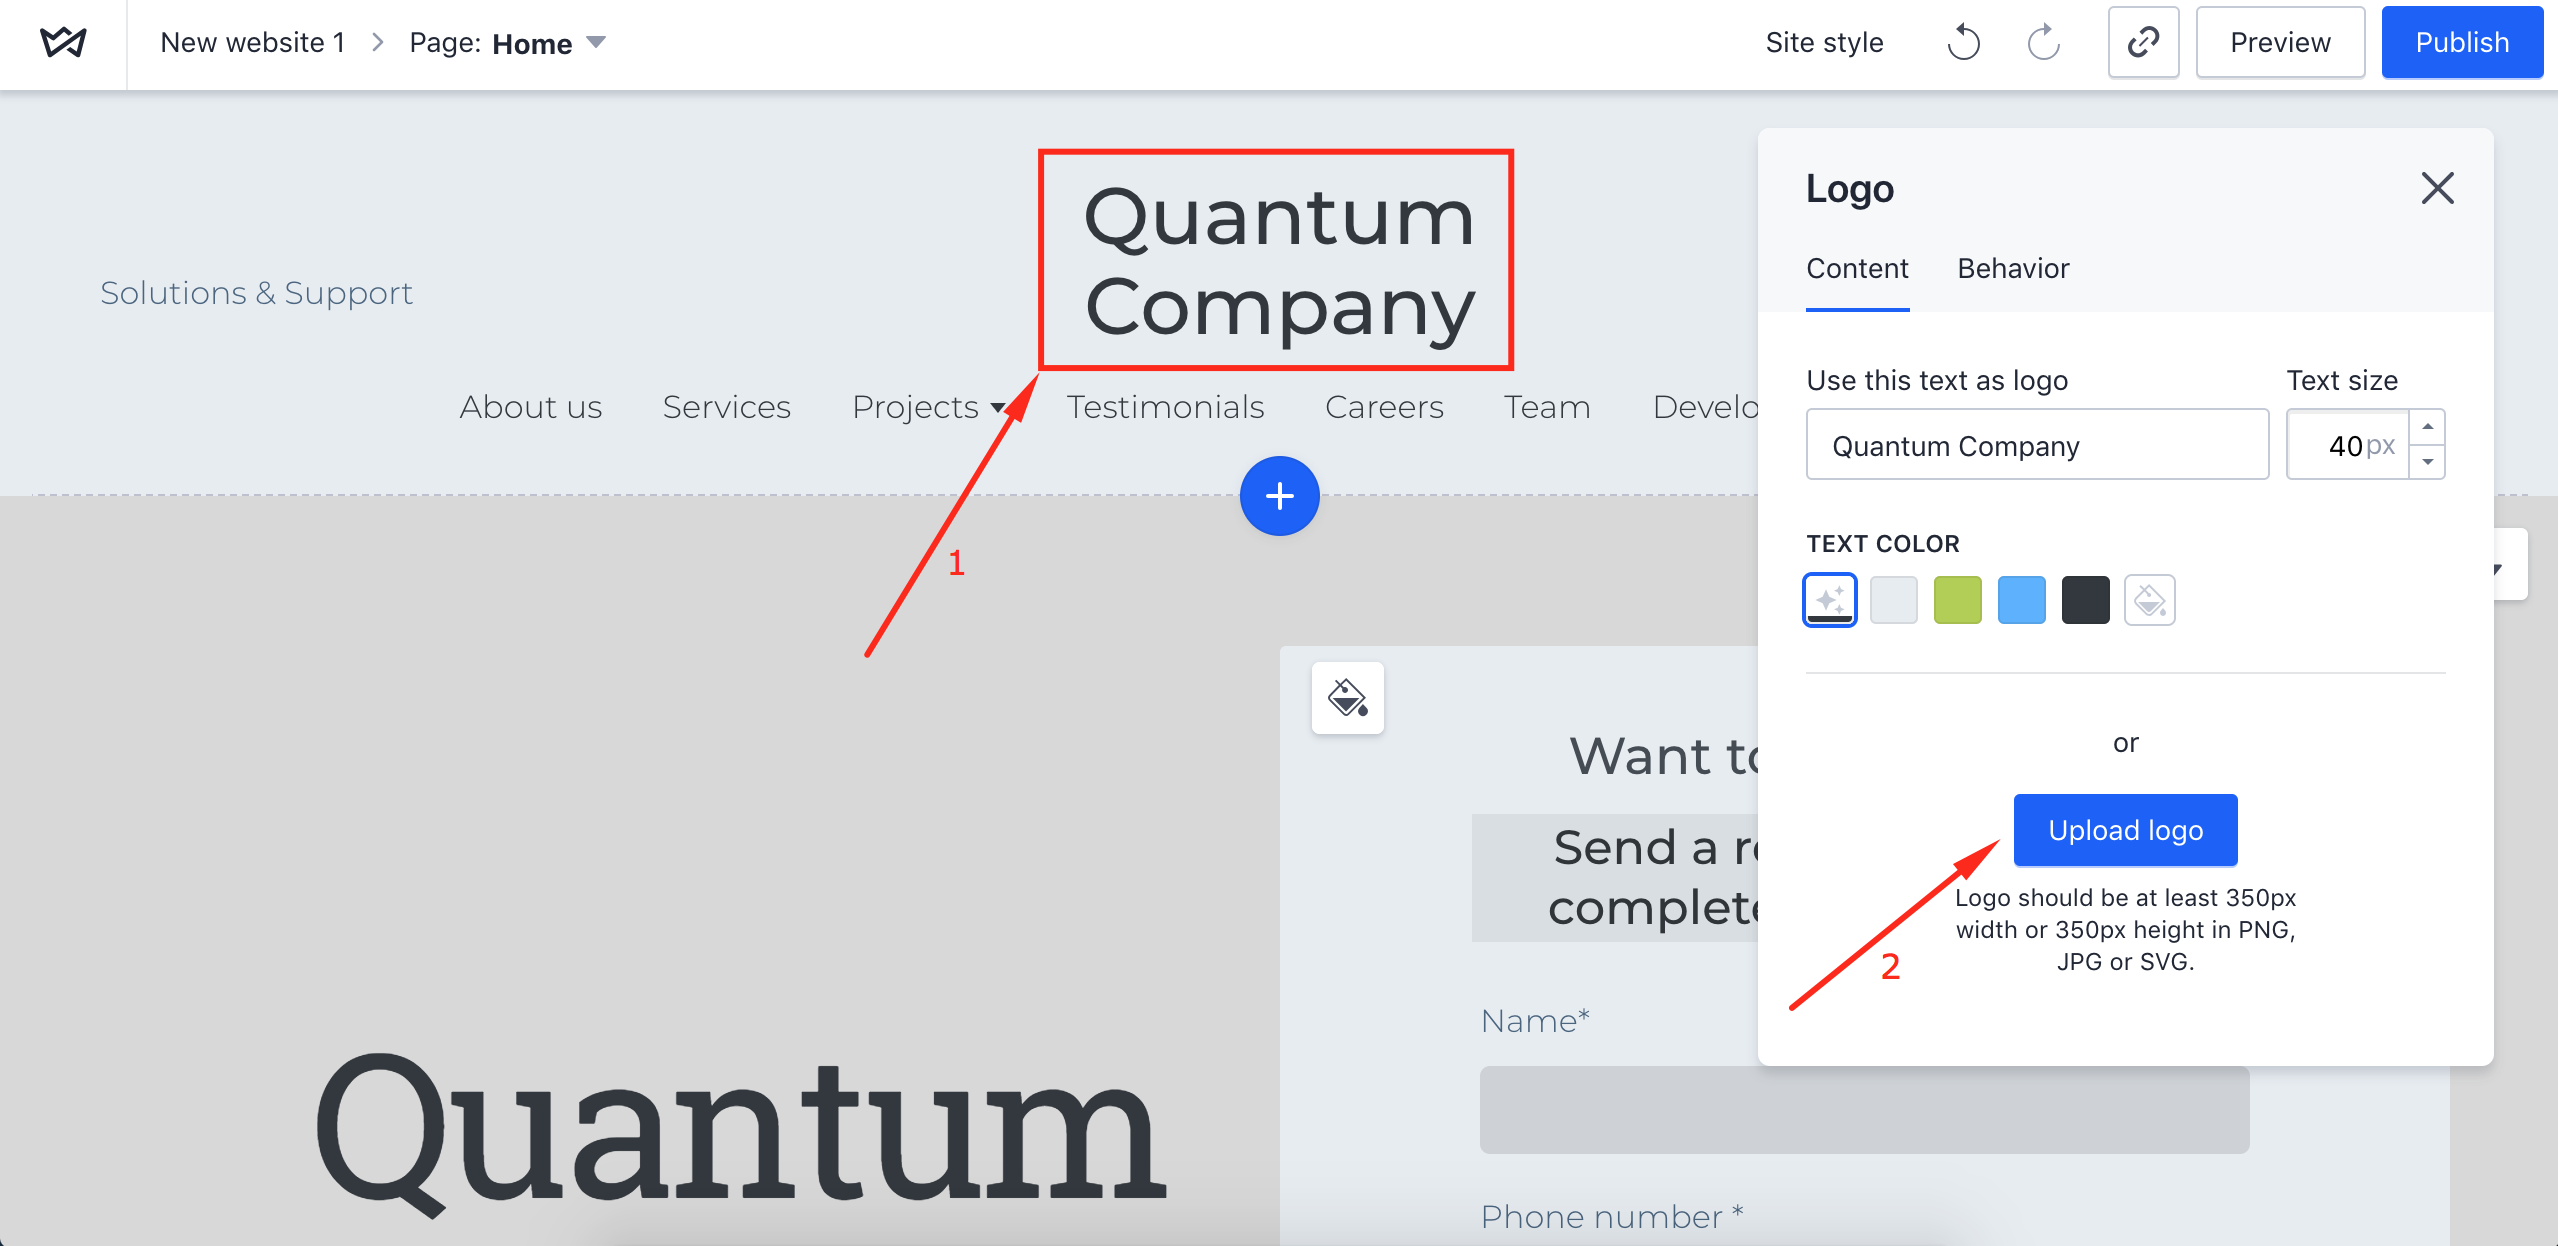
- Click the Logo settings in the Header or Footer.
- Click the Upload logo button.
- Choose the logo from your files.

NOTE: The file that you want to use as the logo must be minimum 350px to 100px in width and height. The format of your logo file must be PNG, JPG or SVG.
How to create a text logo
- Add a Header or Footer block, which contains a logo element.
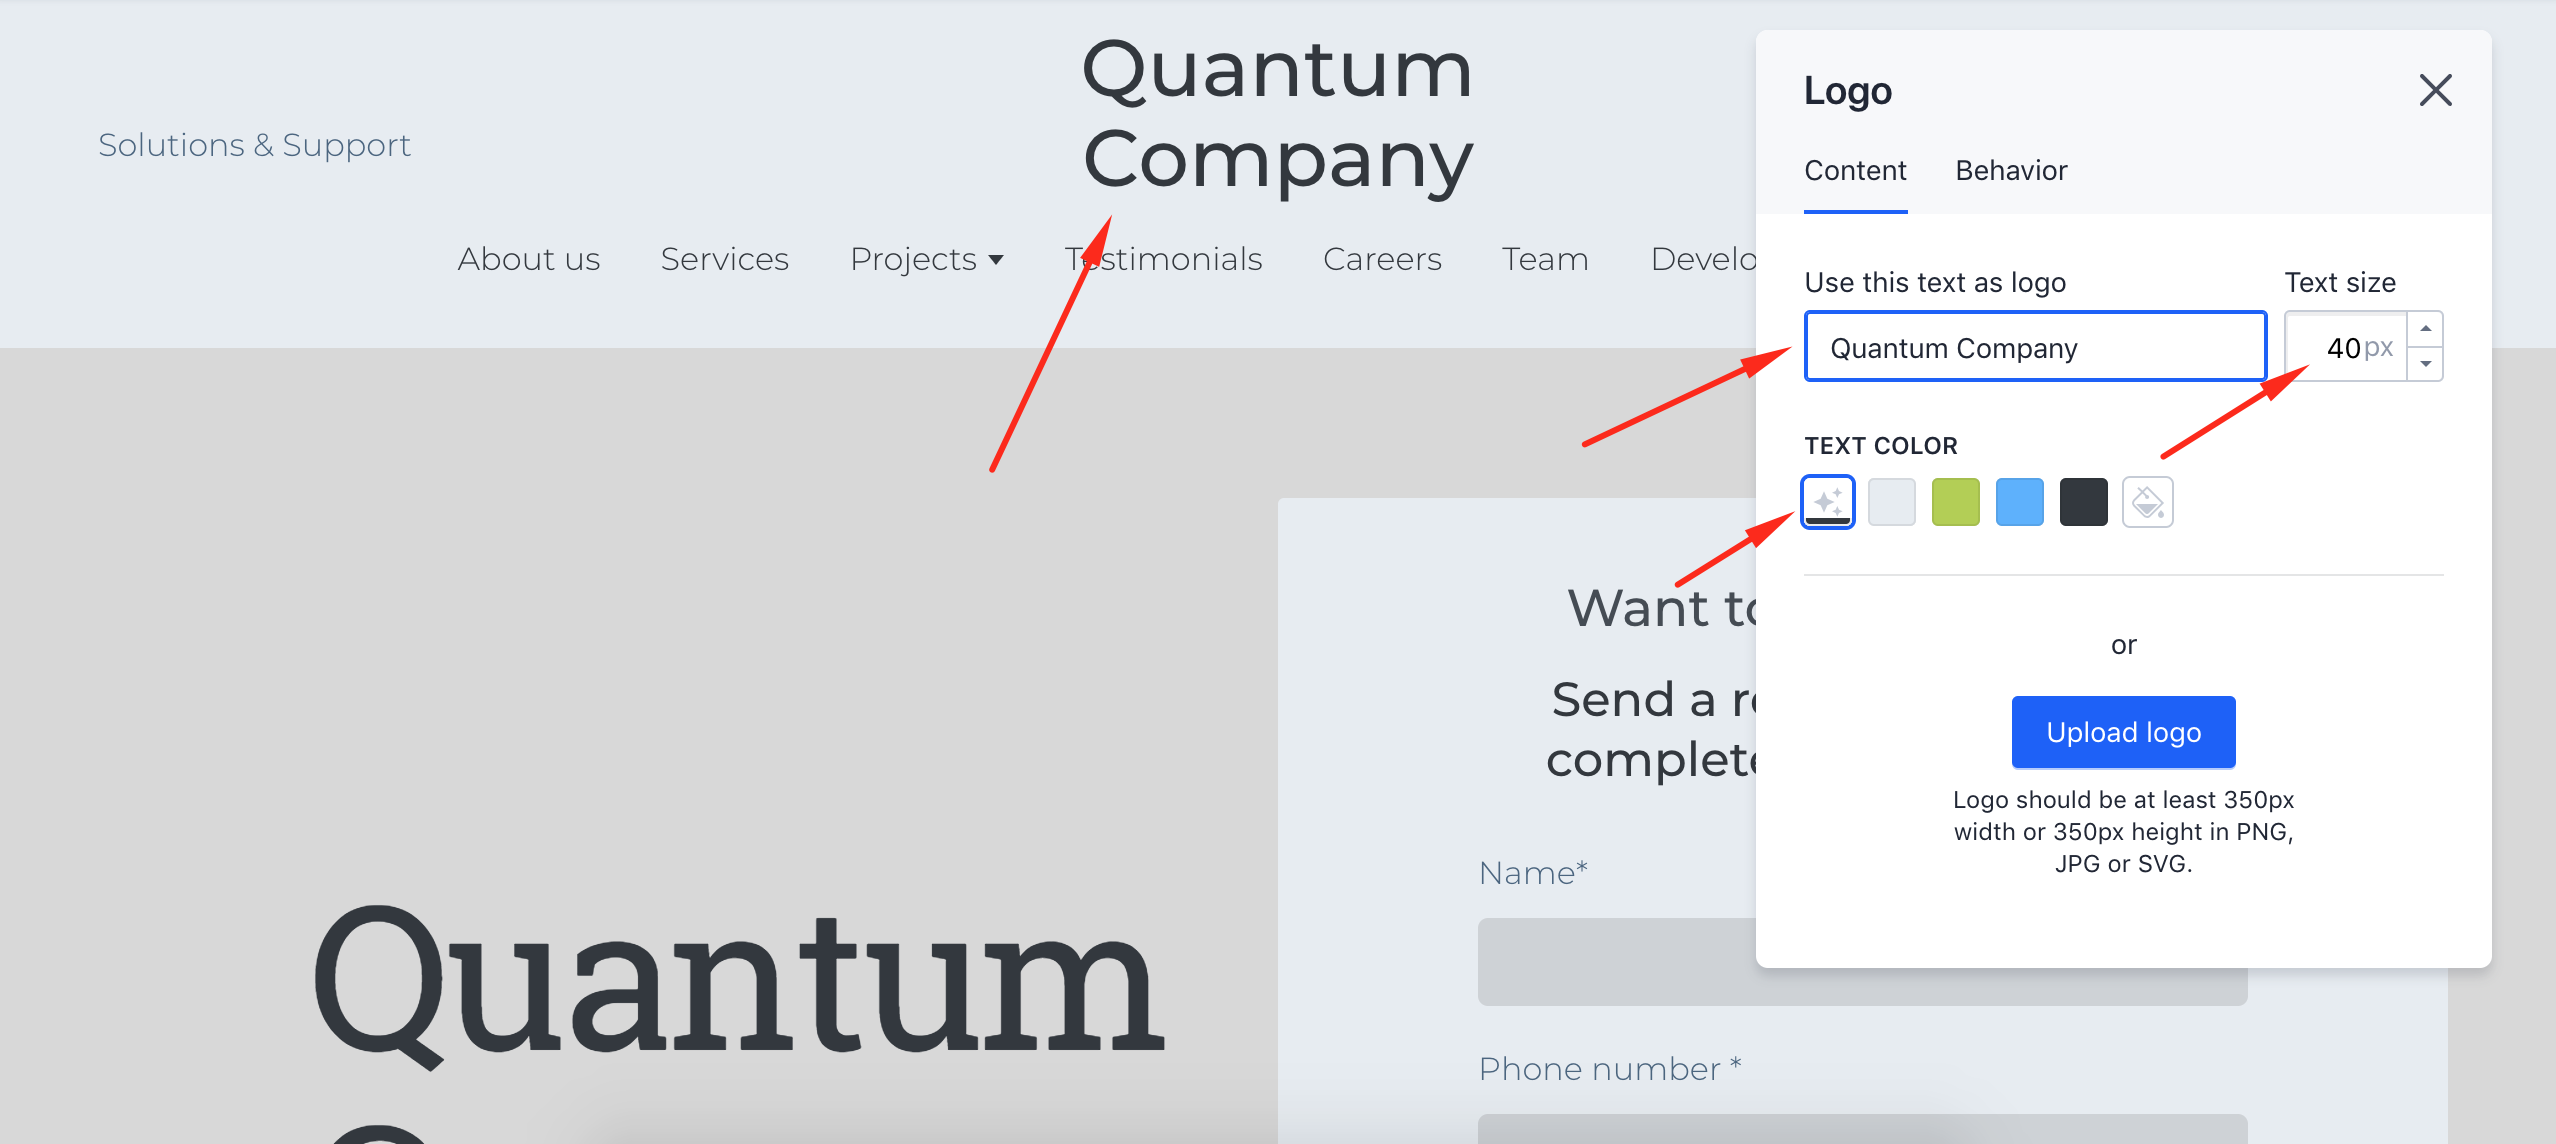
- Click the Logo settings in the Header or Footer block
- Insert the text in the text box
- Adjust the size of the text using arrows or type in the size of the logo you need.
- Choose the color of your logo

How to change a logo
- If it is an uploaded file, click on it, remove it, and upload a new one.
- If it is a text logo, edit it in the Logo settings.
By clicking on the website logo, 36% of users expect to return to the Home page. It is convenient if the user gets to an internal page on your website from a referral one. However, you can adjust the click action of your logo.
How to set click action for a logo
To set Click action of your logo, open the Behavior tab in Logo settings. You can set such actions:
- Scroll to a particular block
- Open a different page on your website
- Jump to a block on a different page
- Link the logo to a different web address.
Logo is an important element of the design of your website, so make the most use of it with the editing opportunities you have.
When you choose and adjust your logo, make sure to click Publish to save all the changes.


