Updated Weblium block management system
Weblium website builder was created at the beginning of 2019, but it has already changed a lot from that time. You may now not know about some features you have in the editor and hold yourself back from making the most of working with Weblium.
In this article, we’ll tell you about the updated Weblium block management system and how it works.
Earlier on, in the Weblium editor, there were only pre-made blocks that you could customize by including or removing pre-designed elements. You couldn’t add a new element to the block or move elements and containers within blocks. Also, you needed to press the “Upgrade” button each time we updated blocks.
In 2019, we converted 150 pre-made blocks to custom blocks to give you full design freedom and diversity of choice.
Let’s dive a little bit deeper to figure out what is the difference between pre-made and custom blocks in the Weblium editor and how you can take advantage of custom ones.
Contents
Custom and pre-made blocks in Weblium
In the Weblium website builder, we have two types of blocks:
- Custom blocks. You can create a custom block completely from scratch or choose a custom block from the gallery of blocks and customize it to your own.
- Pre-made blocks. Pre-made blocks are old blocks that include only those elements that are displayed in its Block settings in the Layout tab. You may insert checkboxes in the boxes you need and uncheck unnecessary boxes to configure the block. Most pre-made blocks were updated to custom ones.
How to figure out if the block is custom or pre-made
Earlier on, we had the label “custom” on all the custom blocks, but we deleted it because it was confusing for users. Now, there is no special indicator that the block is pre-made. You can figure it out on your own in different ways.
- To find a pre-made block, go to the Block settings. If the block is pre-made, you’ll see the checkmarks for adding or removing the block elements.
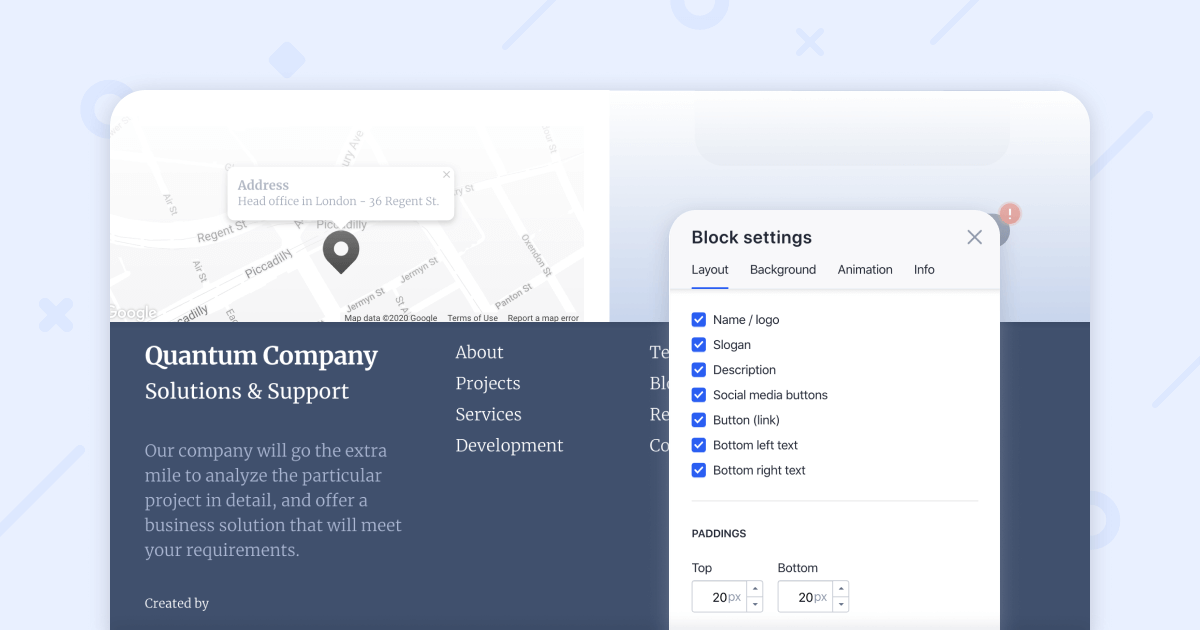
Here is what the Block settings in pre-made blocks look like.
To identify a custom block, navigate to the block and hover over it. If the “plus” sign, as well as horizontal and vertical dividers, appear, it means that the block is custom.
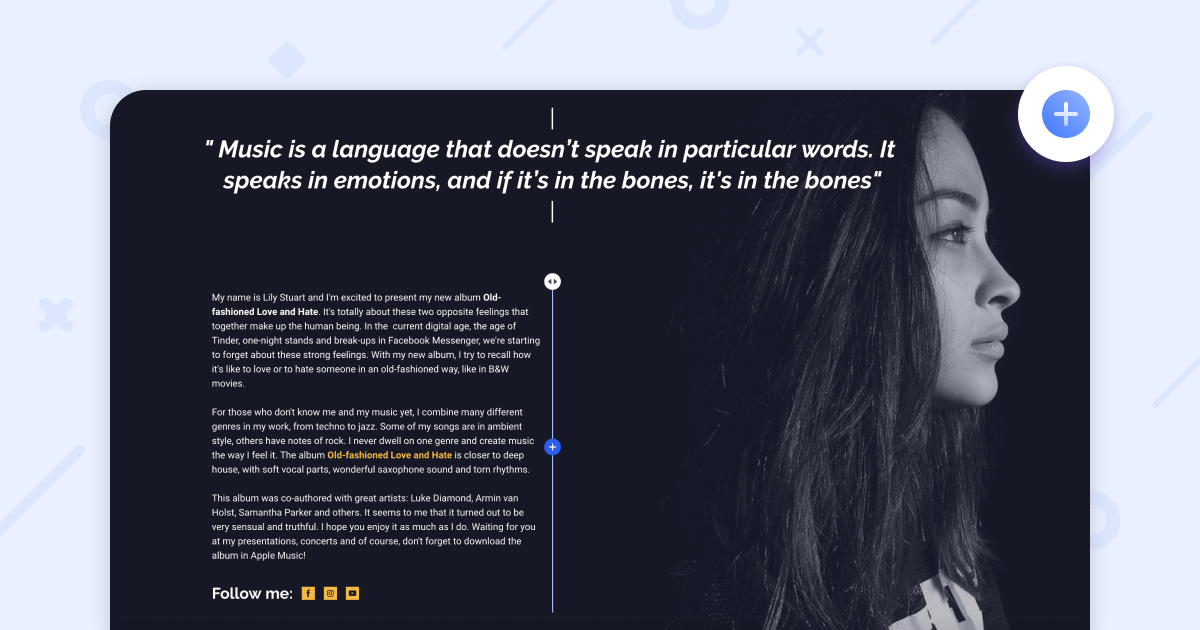 Here is what custom blocks look like.
These two types of blocks differ from each other, not only in terms of interface design. Custom blocks are more flexible and user-friendly than pre-made blocks.
Take a look at some benefits of custom blocks.
- Always up-to-date with the latest improvement. You don’t need to hit the “Update” button to synchronize a block on your site with our updates. All the updates we release apply to custom blocks without any edits on your side.
- Unlimited elements in the block. Do not hold yourself back by using blocks with a limited number of elements. Add as many elements as you want in any place in the custom block by clicking on the “plus” sign. Do not worry about how custom blocks will look on mobile; they will adjust to different devices automatically.
Moreover, our AI helper won’t let you exceed the maximum columns available in the block by automatically keeping the right padding and left padding in the block. - Each block is your ideal one. You don’t need to wait until we create a block that fits your needs. All the custom blocks can become a perfect match for you, as they are completely customizable.
- More design options. Now, in the same website builder that you got used to, you can create entirely different sites. We didn’t build another editor; we create new blocks that allow you to assemble totally different sites.
- One block—constant use. You don’t need to reassemble the block each time you want to add a new element to it. Just do it in one click whenever you want.
- Drag and drop feature. You can easily rearrange containers and elements within one custom block. To do so, pick the element, drag it to the desired position, and drop it.
- Gallery of elements. For the moment, you can add 34 pre-built elements to custom blocks, such as contact forms, Apps Buttons, maps, dividers, etc. Almost 14 of them we created in the last year. You can add or remove them in a click and customize them in the element settings.
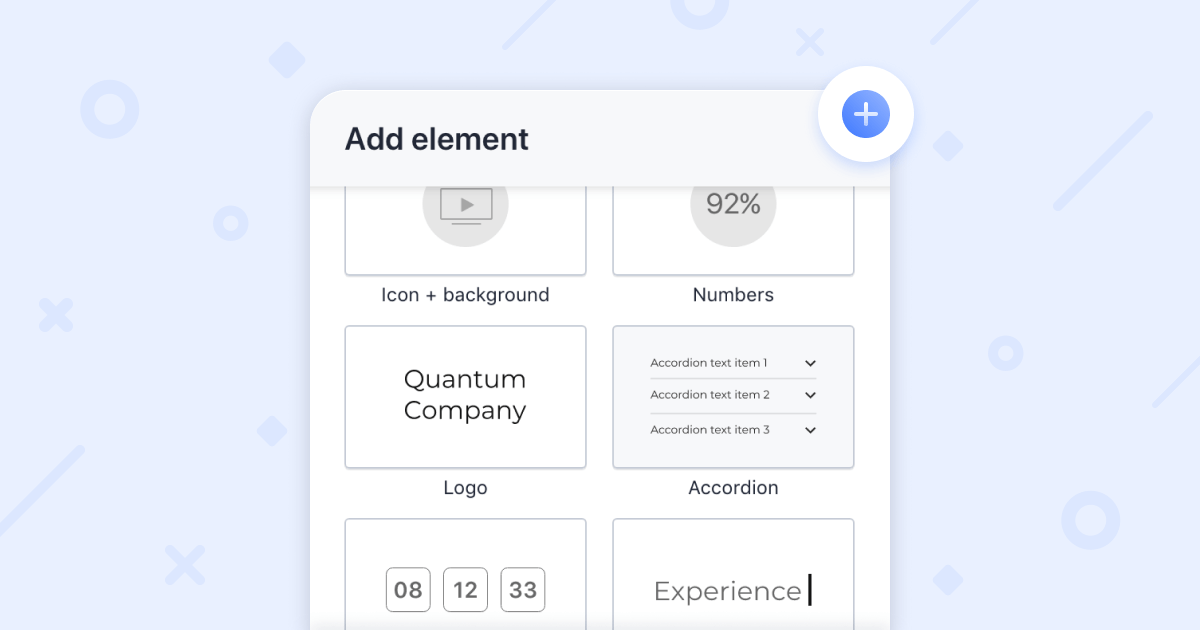 Here is what the gallery of custom block elements looks like.
As you have already realized, custom blocks have more advantages over the pre-made ones. Our #1 priority is to transform all the pre-made blocks into custom ones so that you’ll be able to add any element to any block.
Right now, we’re converting pre-made blocks to custom, so due to these improvements, a pre-made block on your site may somehow display incorrectly.
If you encounter such an issue, you have two options:
- redesign a block into a custom one yourself;
- ask our support to reassemble the block.
How can you redesign a pre-made block into a custom one?
If you wish, you can redesign the old block yourself and update the style of the block at the same time.
To make an old pre-made block a custom one, take the following steps:
- Click on the “plus” sign in the editor.
- Choose a custom block from the gallery of blocks. Use categories to find the ready-made custom block more quickly or choose a blank custom block in the Custom block tab.
AI magic: when choosing a new block, you may notice that all the blocks fit your site style, fonts, and buttons. Our AI helper knows what style your site has and adjusts all the new blocks to your Site style. You don’t need to customize the design of a new block manually. Everything is done for you, so converting a pre-made block to custom will take you a few minutes. - Click on the “+Add element” button, and add all the elements you had in the pre-made block to the custom block.
AI magic: although you can add an element to any place in a custom block, you won’t be able to sleep on web design patterns. Out AI will control the editing process of the custom block by keeping necessary margins and allowing you to add a limited number of elements in a row. It will help your block look perfect on all the devices. - Feel free to customize added elements whatever you want. To do so, click on the Element settings and navigate to the Background and Layout tabs.
If you have no time to redesign a pre-made block on your site, just сontact us at support@weblium.com or write in chat, and we’ll get you covered. Professional web designers from Weblium Studio will rearrange your block in a few hours at absolutely no cost.
Columns and collections
Here is one more classification of components in the Weblium editor that helps you get the whole understanding of what Weblium block management system is.
We have two types of containers – collections and columns. They have different functionalities and let you customize elements in blocks differently. You can find blocks with collections or columns in the gallery of blocks.
What is the difference between collections and columns?
Collections are block containers that consist of a group of items, which are synchronized with each other.
When you add a new collection item to the block, it inherits all the settings you set up in the first collection item. When you delete or add an element in one collection item, the changes appear in all the other collection items in the block. Of course, it doesn’t relate to the texts and images that you can customize separately.
Collections’ functionalities are beneficial when you need to create a few same items in one block, for example, in a block with items cards, speakers’ bios, services, or benefits.
 Here is what the block with collections looks like.
To see the collections in action, hover over the collection item and click on the “+Item” button.
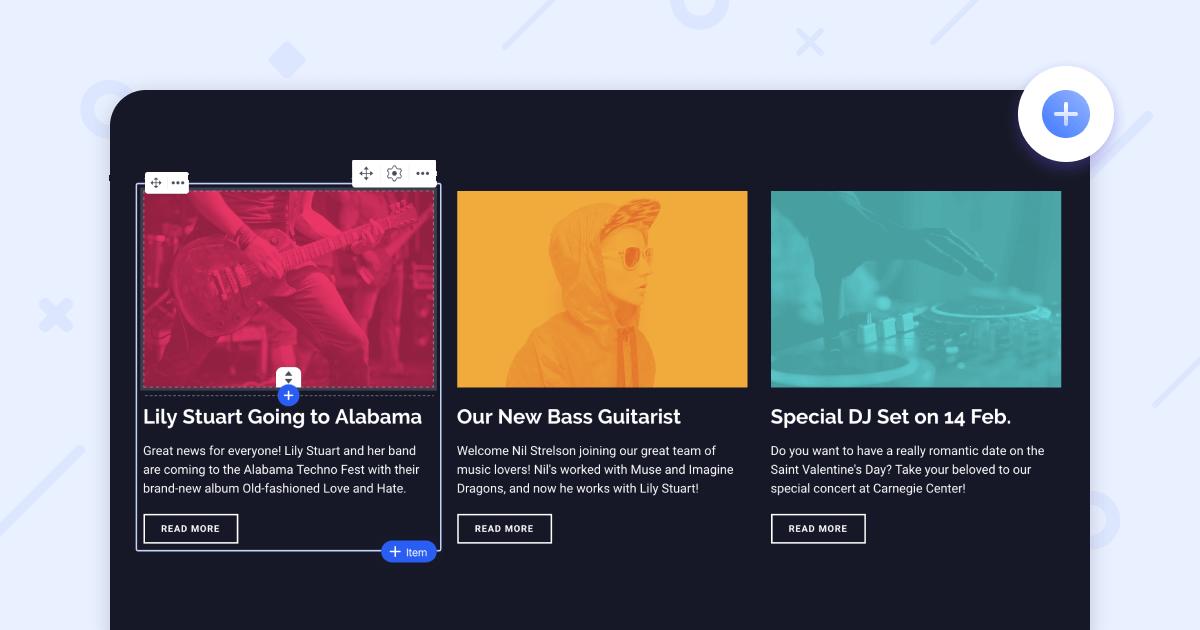 Here is where you can find the “+Item” button in collections.
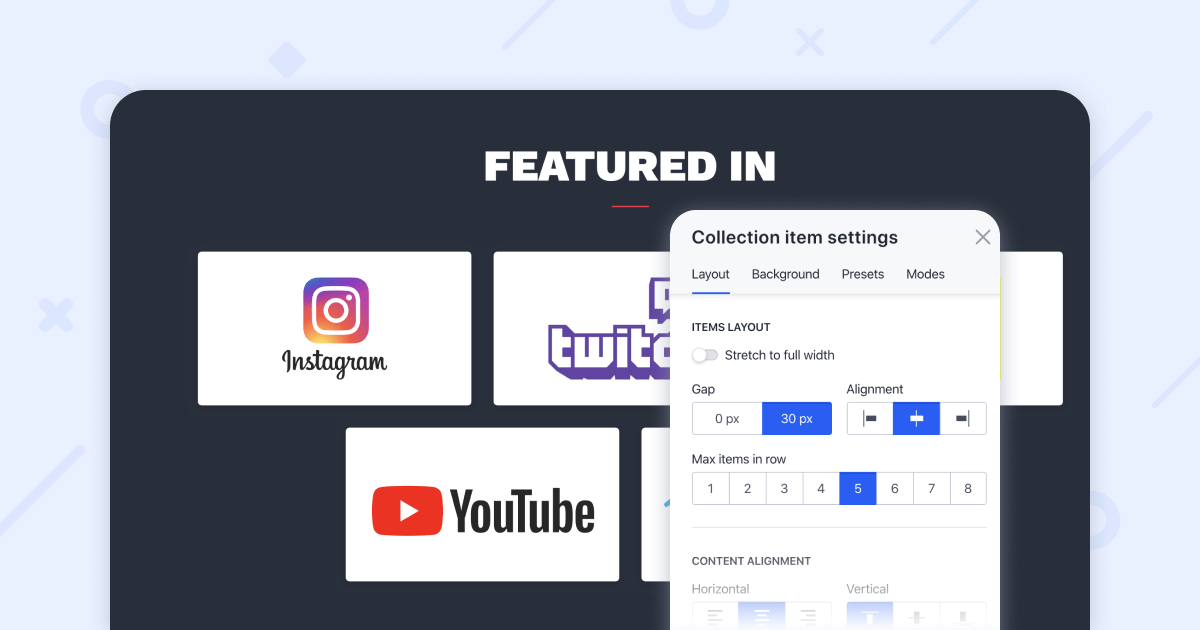
The unique thing about collections is that they have special additional settings – Sliders and Tabs. You can find these settings in the Modes tab in the Collection item settings.
Use the Tabs mode to showcase pricing plans, menus, or job vacancies in a precise and visually appealing way. Enable the Slider mode to create slider galleries on your site.
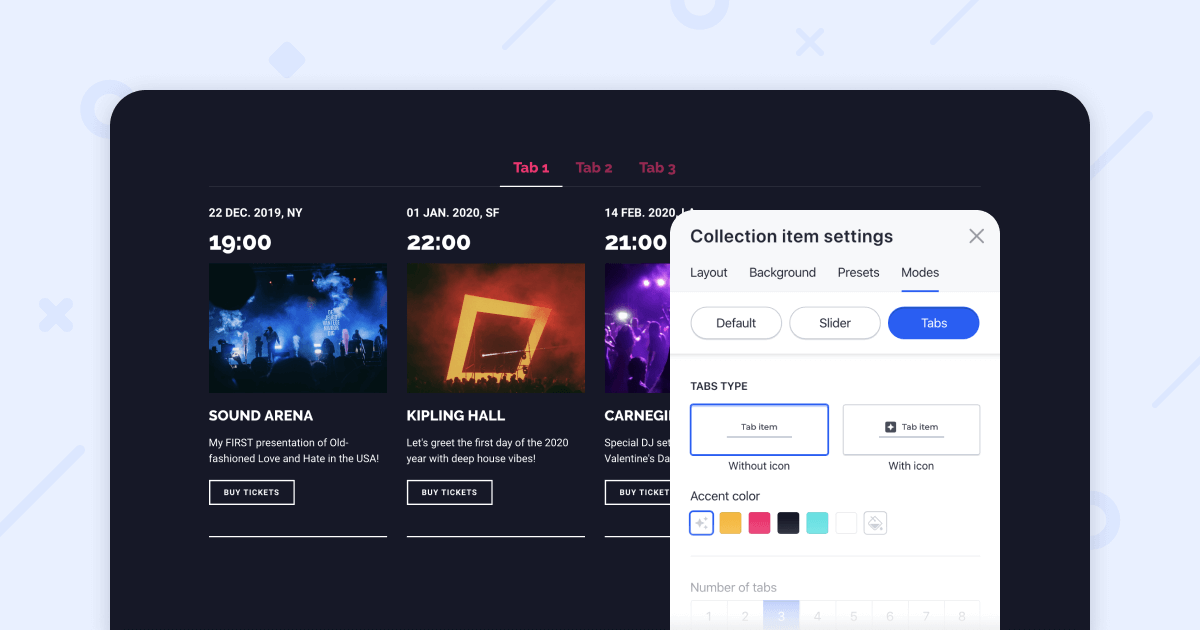 Here is where you can find Tabs and Slider modes in the Collection item settings.
If you’re more than interested in these features, give them one extra minute and read our detailed guides on how to enable Tabs mode and Slider mode.
Columns are block containers that are not connected with each other. You can add a column item wherever you want in the custom block and change the width of the columns by dragging the column divider. Note that it’s possible to do if you have less than 3 columns in one custom block.
As opposed to the collection items, changes that you make in one column won’t be displayed in other column items.
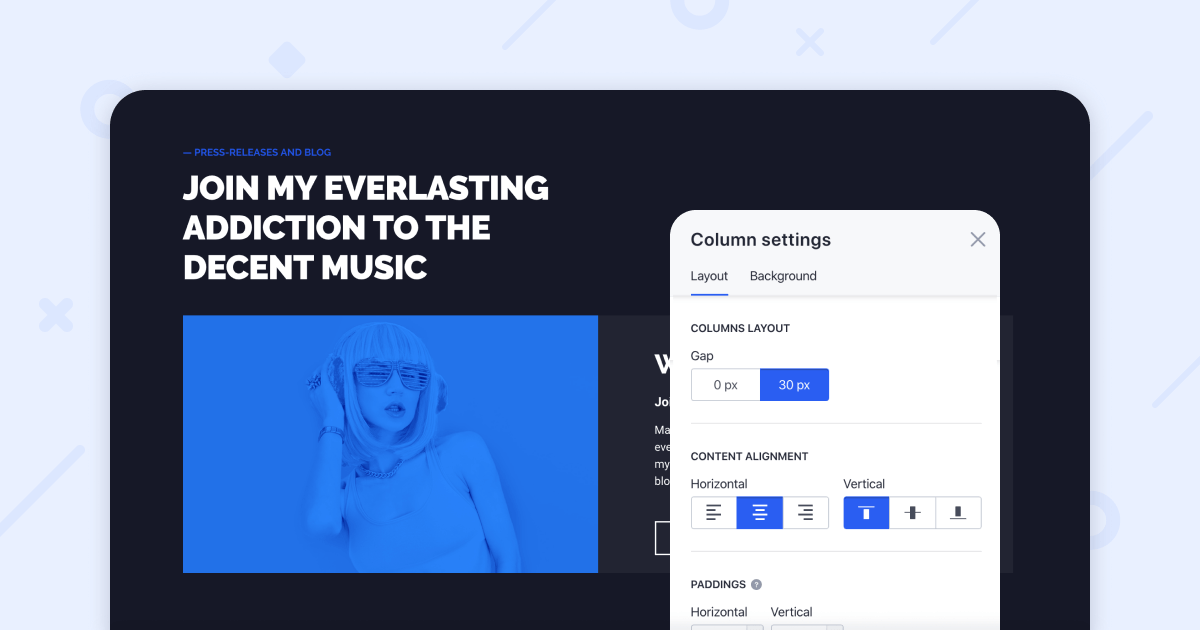 Here is what the block with columns looks like.
Need more information? Check this ultimate guide on how to manage blocks with columns and collections.
Note that if you need a block that doesn’t exist in the editor yet, you can request it. Just go to the gallery of blocks, scroll to the bottom of the menu, and tap the “Request a block” button. We’ll consider your request and create your ideal block as soon as possible.
Thanks for reading this blog post up to the end. We’re inspired by your intention to make your website rock.
If you have some questions, you can always contact us at support@weblium.com.