Beginner's Guide on How to Make a Website: 10 Effective Steps
Dedicated to everyone who wants to successfully develop his online business.
If you have your own business, you probably feel that urgent need to go online. Social networks, advertising campaigns, promotional offers – all these tools are crucial for today’s entrepreneur “survival”. However, many owners often neglect one significant step in promoting their product on the web. And this thing is having a website. It`s no surprise – the need to have a site has decreased dramatically because nowadays there is a great variety of social networks with vast functionality.
But is it really so? In this article, we will answer this and many other questions related to this problem.
First of all, you should understand that it`s easier for you to earn their trust when you have a website. Even if you are not a big entrepreneur, a sought-after freelancer or your business is at the start-up stage right now, a business card website or portfolio increases your chances to find new customers and take your business to a higher level.
So, sooner or later, you’ll have to face questions like, “What is a landing page?”, “How to make a website yourself?” or “How to make a website for free?”
Unfortunately, many entrepreneurs neglect the need to create a site, because they believe that the IT professionals charge a lot for their services. Don’t worry – there is an alternative solution: platforms that help you create a website without spending a penny on design, development, or customization. At the same time, such a site will have no restrictions that could have to prevent its promotion, functioning or modernization, and sometimes, and even simplify and accelerate the launch of your project.
At the same time, do not worry that the functionality will be limited – your site will be indexed by search engines and look professional on any device. We will tell you how to make it using our own experience. Ready?
How to create your own website – beginner`s guide!
Contents
Step 1. Determine the way you want to create a website
First of all, you need to choose the right platform.
There are two options:
1) CMS (a website content management system where you need to make all configurations yourself);
2) site builders (the process is as simple as creating a presentation in PowerPoint).
If you choose a CMS option, the most popular options would be WordPress, Joomla, Drupal, Shopify. It is worth remembering that this is quite a complex tool, especially for beginners. You will be able to understand the functionality, but be prepared that it will take more time and resources, and the site itself will cost you at least $75 (without additional costs on domain and hosting).
If you are a beginner, we recommend you to choose a more practical option – a website builder.
Wix, Weblium, Squarespace, and Jimdo are considered to be the most popular builders.
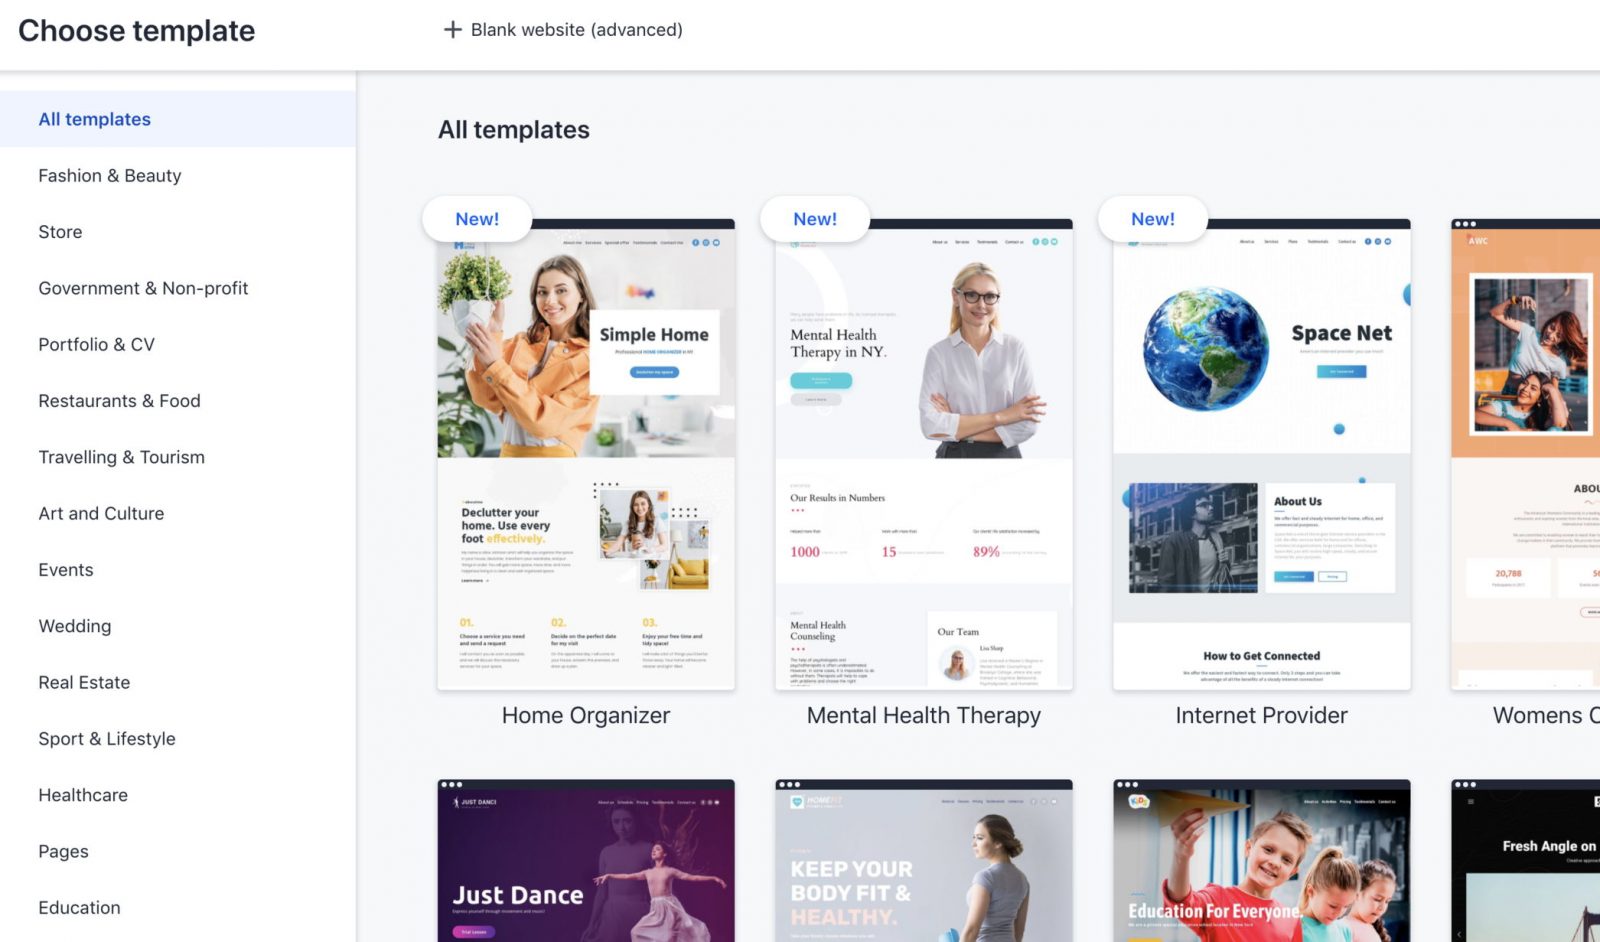
Let’s take Weblium as an example. Here you will find more than 300+ different templates that will suit absolutely any business niche.
Step 2. Sign up and select the template
First, sign up with the platform. Enter your details or use your Google or Facebook account.
Once registered, users end up in the admin panel. This is where the creative process begins. To start, you need to click “Create a new site” button and on the left, you will see a gallery with dozens of templates with different themes and styles, categorized for convenient search.
Step 3. Add content and edit your template
After you have chosen your template, you should take the time to fill it with unique texts and images. Website navigation, color palette, font style and size, animation – you can customize everything you want. This is a very important stage, because the more professional your site will look, the sooner you will be able to get new customers and bring your company to a higher level.
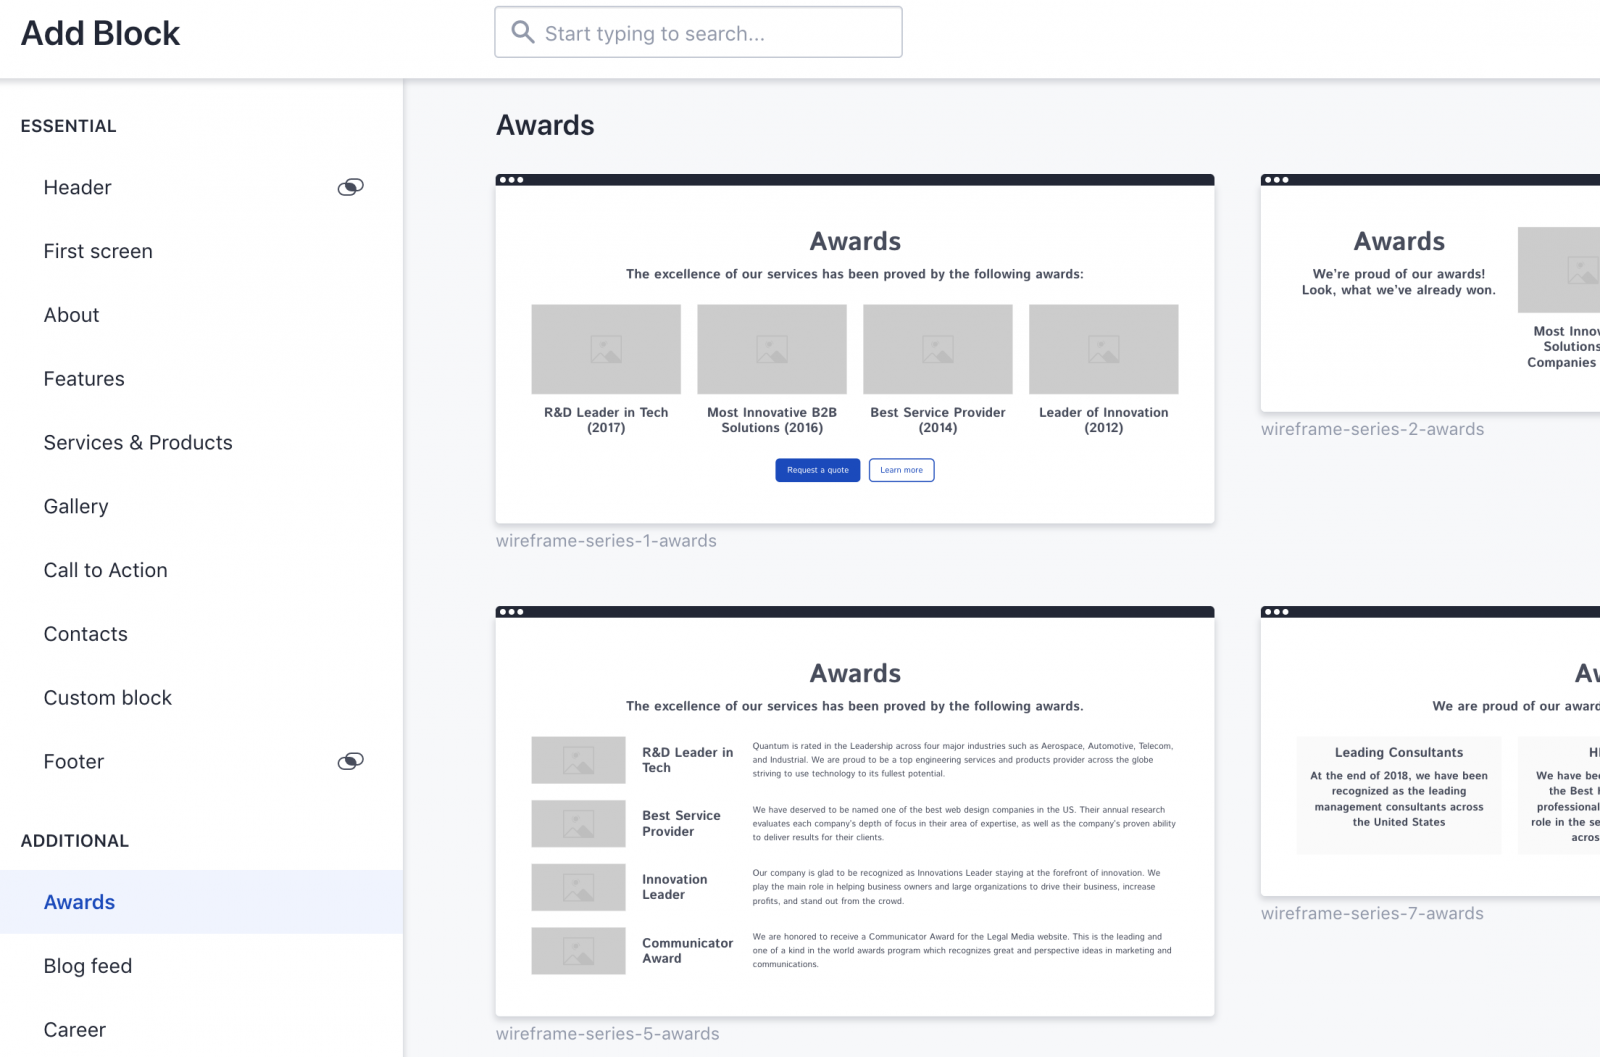
If you decide to create your website with Weblium, then we have some great news for you: you will get your website done within a few hours! Weblium’s visual editor is intuitive and easy to use. You can add or delete blocks, change the color and style of text on the page, rearrange buttons, edit menus. Simply put, customize the template according to your taste and make it unique. Don’t be afraid to experiment!
Step 4. Create new pages
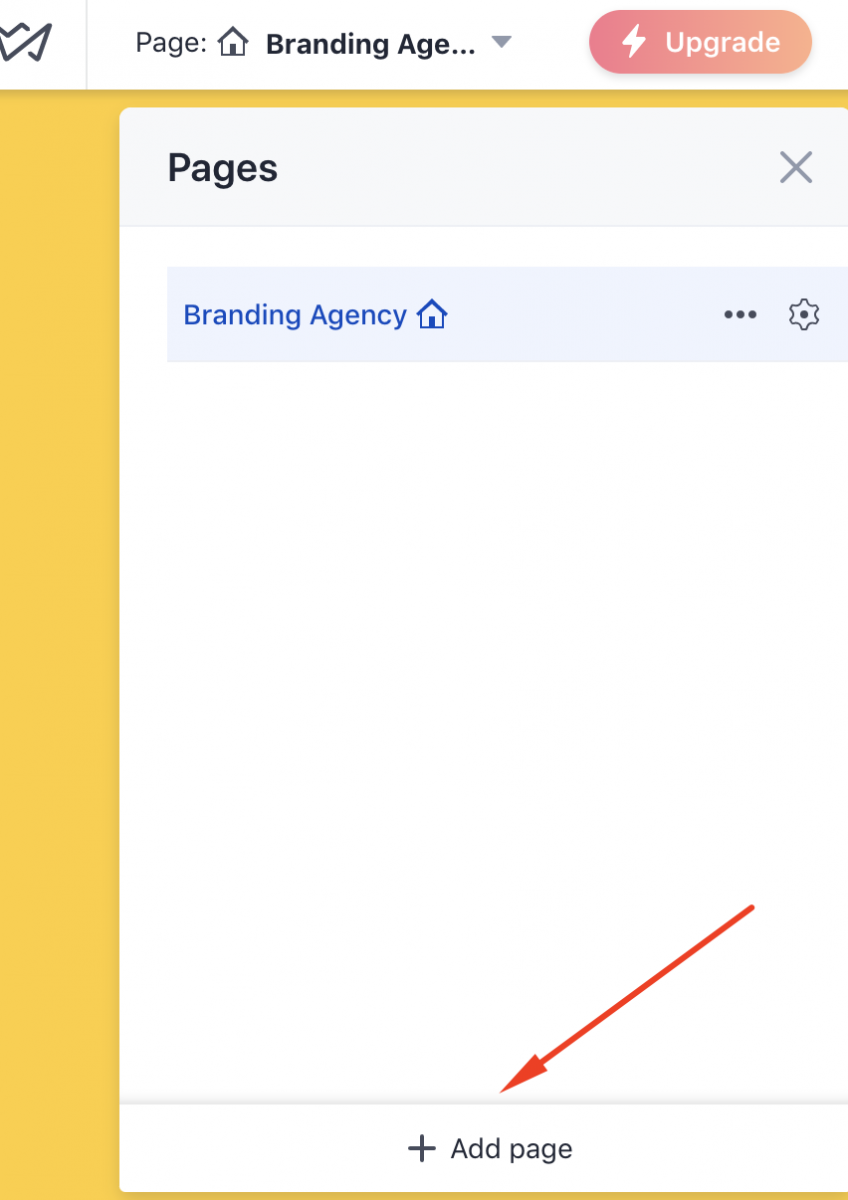
What does this mean? Usually, the necessary pages for a particular site are already thought out at the template stage. That is, if in addition to the basic information about your product or service you want to notify your customers about the contact form, product description, show the examples of work, then you can do it by adding a few new pages. Just be sure to add these buttons to the menu and put the right links!
Step 5. Configure SEO Settings
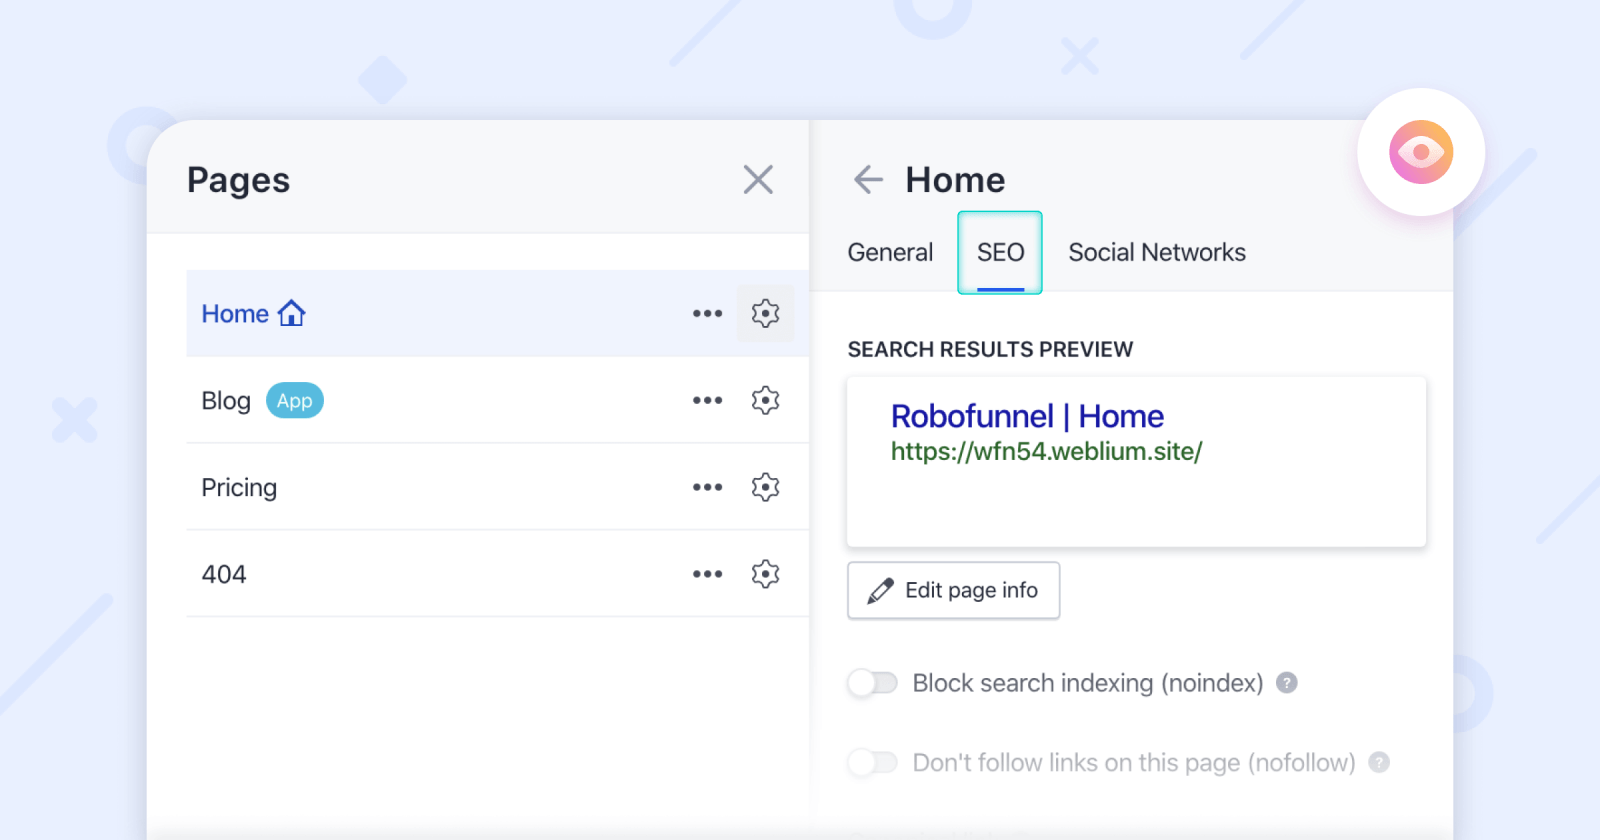
What is it? In simple terms, SEO is a set of measures to optimize the site for search engines such as Google, Yandex, etc. SEO settings are very important for improving the position of your site in the search results. Note that all templates on Weblium are optimized for search engines by default: all the unnecessary elements are automatically removed from the page, they load quickly, etc.
We recommend adding the correct title, description, and keywords, H1-H2, as they help the site to get to the top of search results.
Step 6. Add CTA and contact forms
CTA (call to action) – is a navigational element that pushes the visitor to take an action. These can be “hot” buttons, contact forms, or just a text with a link to other pages. If you don`t have such CTAs, you run the risk of losing your potential customers. The visitor will not understand how to deal with all this information.
Don’t forget, you don`t have to put these items on all pages – only when it is appropriate. Make them sparkling, noticeable, so that they draw the attention of customers.
Step 7. Connect analytics metrics
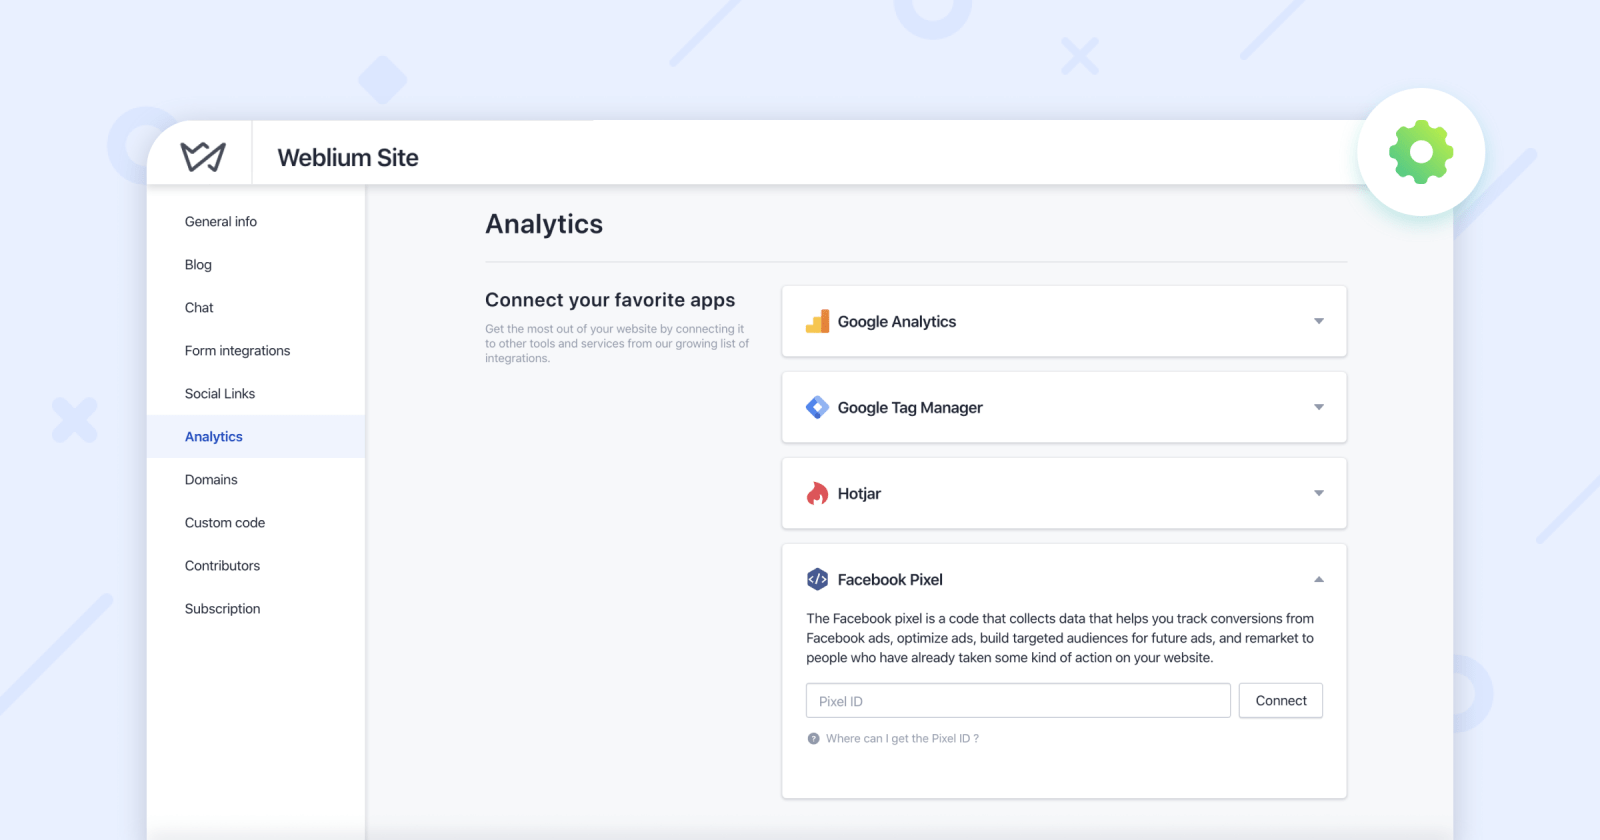
You need them to track the activity on your site: which links are most clickable and what attracts the most attention. To activate them, go to the admin panel, then open the Analytics tab. Here you can customize integration with other tools and services such as Google Analytics, Google Tag Manager, Hotjar, etc.
Step 8. Check your website
Be sure to double-check your website before you publish it! Share it with your friends so they can give you feedback on your work. Use the “Co-Authors” feature, which will allow you to leave tags right on your site! Other users will be able to view, edit, and publish the site (but they won`t be able to delete or duplicate it).
Step 9. Create a blog
Keeping a blog is certainly not an easy task, but believe us, your business will only benefit from this! Here you will be able to share your knowledge and experience. And customers, in turn, will find the answers to their questions in your posts.
By the way, with Weblium you can do it for free. But first think about what you want to write, and for what purpose. For example, this blog can serve as a tool to attract visitors, partners, or be an information resource. This option is good for both corporate sites and online stores.
Step 10. Show your website to the world
The most exciting moment! Make sure all the final edits have been made, check the quality of the visual content, select and connect the domain for your site in just 3 clicks, take a deep breath in and click “Publish”! That’s it, your site is ready to use. Don’t forget to share a link on your social networks and prepare to meet your new customers!
Hopefully, this article was helpful and you learned something new, thank you for reading!


