How to Make a Moodboard in 7 Simple Steps
A moodboard is a collection of references and other data that sets a certain style or concept for your project. Designers, illustrators, photographers create moodboards to collect the concept of an idea in one place.
For example, a web designer needs to create a website for an online flower shop. He begins to collect examples of competitors’ sites, to select the design of similar projects from Behance. After choosing the best options, the designer goes deeper into the idea and selects: site color schemes, typography and site elements. Only after that, work begins on creating a prototype of the site.
How moodboards help with website development:
- Set the style of the site
- Accelerate site creation thanks to references
- If you make sites to order, this will protect you from misunderstandings with the customer
Contents
What platform should I use to create a moodboard?
You can create a moodboard in Word, but it is better to use special services that solve this task. Services are more convenient because there are built-in libraries of images and fonts.
Choose the service you will work with and let’s start with the first step.
1. Determine the direction of your project
Moodboards can be literal and practical (with fonts, color schemes, and images), or they can be about exploring tone and mood.
These two types can be done in parallel. On one board you indicate what colors, patterns and images will be. And on the second — in what style the site will be created.
When the first version is ready, make a short description on the moodboard. This will help you narrow down your options and continue moving in one direction.
2. Collect existing material
Now that you’ve determined the direction for your moodboard, add these qwto the board: brand values, positioning, any logos, design elements, and photos. They may not make it into the final version of the moodboard, but these data will help you get started.
3. Add images
The images you choose to include in your moodboard can affect the look and feel of your site. They will help determine things like tone, framing, style, and color scheme.
If you can’t think of any sites you’ve liked, examples can be found on Dribbble, Behance and Designspiration. Here, different designers share their work, which can be sorted by project type, color scheme, and other important parameters.

Don’t worry about organizing the images, we’ll do that later, for now you can add them randomly.
4. Add examples of animations
Animation on sites can be completely different: from the simplest, which is practically invisible to the user, to complex with a wow effect, such as, for example, parallax.
By doing this, you will expand your understanding of which animations are needed on the site, and you will develop a design based on them.
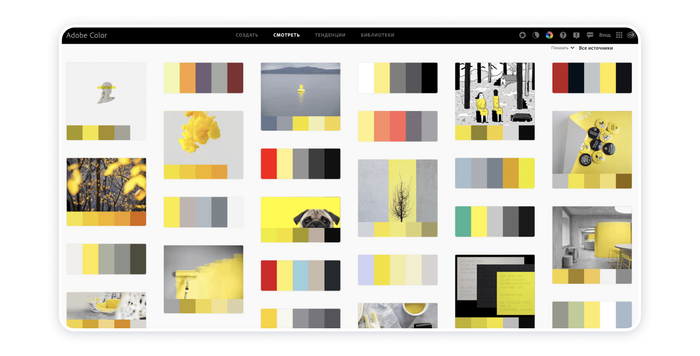
5. Add colors and fonts
Color can be a good option to express certain feelings and individuality. For example, it is better to create a pharmacy website in light colors, and a night club page in dark and bright ones. But for each of these sites there will be one or two colors that will show the individuality of a particular site.
The Kuler service will help you find colors that complement the brand. Another life hack is to choose colors directly from images and photos you’ve added to your moodboard.
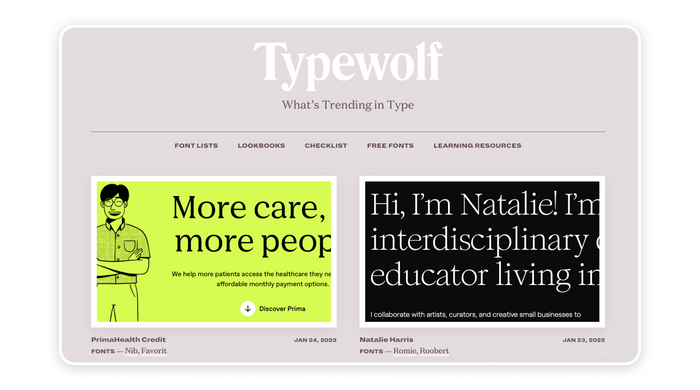
And for the selection of fonts, use the design site Typewolf. This is a great way to learn different combinations of fonts and how they interact with each other.
6. Time to put things in order
Once you’ve gathered all your ideas in one place, the next step is to organize them to create the perfect composition.
This process can take some time, and it often feels like you have no idea what the moodboard will look like. Most likely, you will have more material than necessary, and it can look disjointed. This is normal!
Start by learning composition and introducing hierarchy. Place a key element, such as a logo, to anchor your board, and change the size and position of other elements to show their importance and relationship.
7. Describe your thoughts
If you’re a visual thinker, a moodboard is an invaluable tool that lets you convey the look and feel of your project in a way that sometimes words can’t. But for the client or his designers, you need to add a description of your thoughts. This will help clarify your ideas and keep everything in context. It is not necessary to go into details — just write in a few words what you wanted to convey with specific images.
You’re good to go!

Now that your reference board is ready, you have a visual representation of what the site design will look like. You can start working on the design itself.
It’s easy to create your own sites on Weblium, because you just select the required content blocks: text, video, slider, gallery, and others, and add them to the page. And if you don’t have much time, you can use 300+ ready-made templates that are suitable for dozens of different areas of business. The automatic system helps you choose the right colors for your site, and it will also use those colors on all selected elements. You will not need to adjust the settings all over every time, it’s enough to do it once. Create your own website easily and quickly on Weblium.